Level Scopes Like A Pro: Tools and Techniques That Work
Just got in new actions and it's time to mount my scopes! In this video, I'll show you my process and the tools I use to ensure a level mount. Let's dive in!
Before I start mounting the scope, let me introduce you to the Howard's total vise that I use for this task. It's a versatile tool that allows me to bring the scope up to eye level, ensuring a comfortable shooting position. This extension feature is a game-changer!
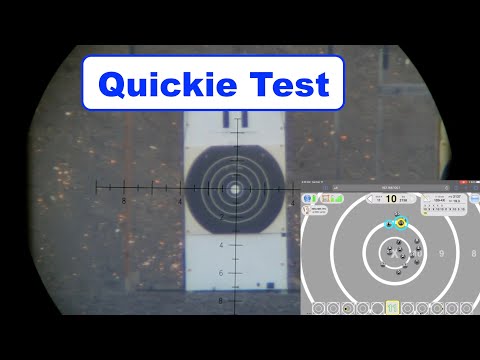
Once I have the vise set up and anchored down, I can make small adjustments left and right to achieve the perfect level. To demonstrate the impact of these adjustments, I'll be using a TriggerCam to show you the before and after.
Now, let's mount the scope! I hand-tighten it first to ensure it's properly aligned with my rifle. It's important to torque it to 45 inch pounds for a secure and repeatable function.
To ensure accuracy, I use the star at level that comes with the total level kit. Investing in a high-quality level is crucial for precise results. Trust me, it's worth the money!
Next, I'll show you how I set up the scope rings and align them with the level. It's essential to have everything tightened down and clamped to maintain stability.
To create a stable reference point, I hang a cord with a weight in a bucket of water. This prevents any swinging or movement caused by wind or other factors.
Now that everything is set up, I can focus on leveling the scope. I align the scope with the cord and make adjustments using the screws in the back of the rings. It's a meticulous process, but it's worth it for precise shooting.
Once the scope is level, I tighten the rings just enough to hold it in place. This ensures that the scope won't move during adjustments or shooting.
Now it's time to add the level and magnifier. I choose MK Machining's level for its slim design and easy installation. It allows me to check both level and windage without removing the scope.
I attach the level and tighten it to 10 inch pounds, ensuring it's secure but not overly tight. This level also serves as a windage reference, providing added functionality.
Finally, I add the magnifier to assist with my eyesight. It's springy and adjustable, allowing me to easily switch between viewing the turret and windage.
With everything in place, I double-check the level and alignment to ensure accuracy. It's crucial to constantly verify and make adjustments as needed.
And there you have it! This is my process for mounting scopes and ensuring a level setup. If you have any questions, feel free to ask in the comments below. Happy shooting!